The basics Rules for STL files
3D printing may seem limitless, but there are a few things that it, or the materials that it uses, can’t do. Here is a quick guide of how to avoid a few no-no’s when designing your model.
1. Draw in solid bodies, not surfaces, they’re easier.
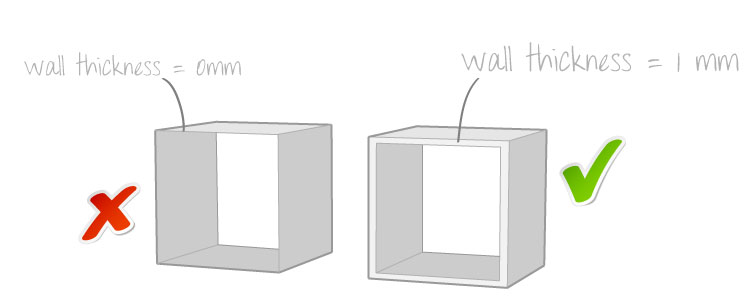
3D printing cannot print surface model CAD models, you must submit a solid body CAD model. The walls can be thin, as low as 1mm (2mm to be safe, and 2mm minimum safe polishing or shotpeening), but they cannot have zero thickness. For minimum wall thicknesses please see our machines. Just remember that one of the few things that is not achievable in 3D printing is printing foil (e.g. tin foil, etc).
If you have drawn in surfaces to create a shape, you must ensure that ALL faces are CLOSED off (see tip number four).
2. No shared edges
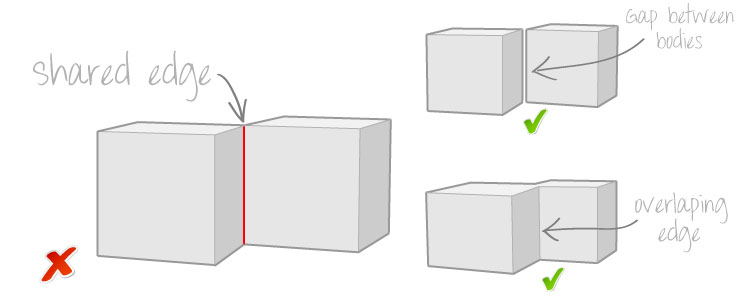
Your CAD file must not contain any shared edges between objects. It is ok to have a gap between the parts (we would always recommend 1.5mm where possible to to ensure a consistent surface finish), or an overlap if the parts are joined together.
3. Normal normals please
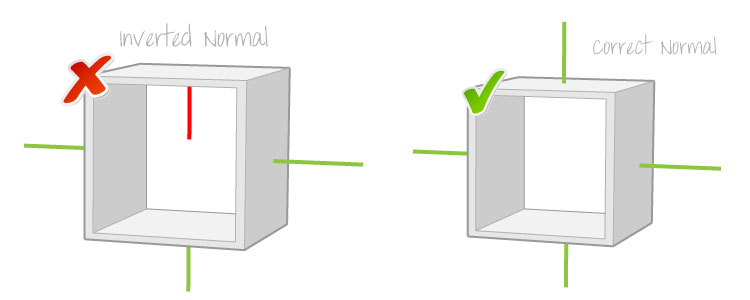
Normals are perpendicular reference points to surfaces on CAD models to define whether the surface is an inside or outside face. An inverted normal is a normal that is pointing in the wrong direction, telling the computer that an outside face is actually an inside face when it isn’t. This can be easily corrected using either Netfabb Basic free stl repair software available on our free CAD page.
4. Shut your face
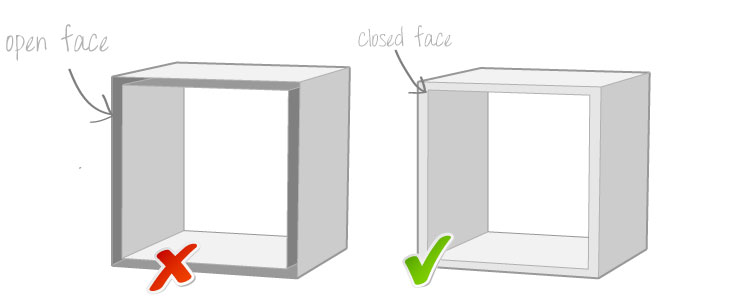
Before your model can go to the printer, it must be checked to see if there are any open faces. An open face is where a model is missing a face from the surface of the part. This error can occur during design when drawing surface models, or sometimes occurs when a file corrupts when saving or converting to .stl format. Use Netfabb Basic to check and correct these for free on our free CAD page.
5. Keep to your limits
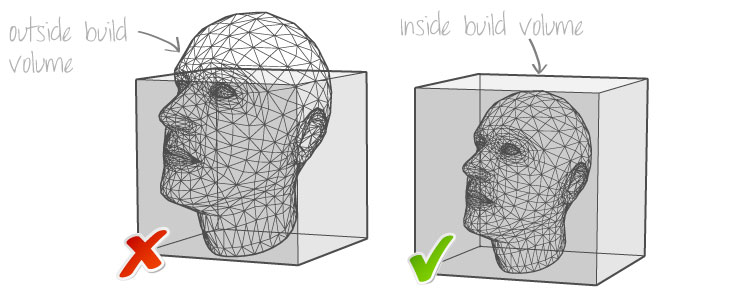
Each machine has a set build volume which you cannot build larger than. Check our machines to see the maximum sizes possible. If your model is larger than the build volume, either break it down into smaller individual components, or cut join lines through the model. We are able to do that for you if required with our CAD service.
6. Scaling down
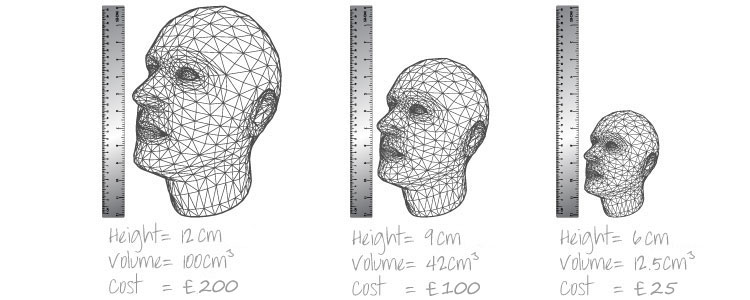
Scaling down your model will dramatically reduce the cost of the print. If you half the dimensions of your model, you will reduce the cost by eight times. See our pricing page for more details.
Remember to keep wall thicknesses to the minimum requirements or thicker once you have scaled down, especially when scaling down large complex objects such as architectural models.
7. Mind the gap
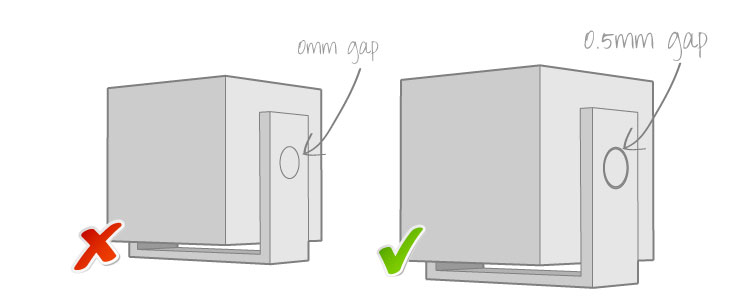
Gaps between moving parts must be at least 0.5mm. Any smaller and the part might stick and prohibit movement. A common mistake when building a model is to make moving parts with zero gap, make sure you check this before print. We can check and alter this for you with our .stl file correction service.
8. Thin arm syndrome
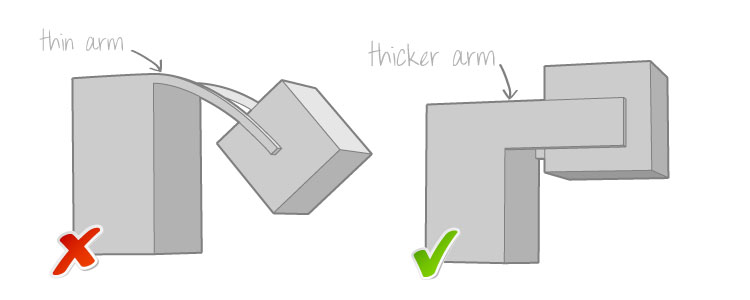
If your model has thin arms with some otherwise unsupported weight at the end, make sure that the arms will be strong enough to hold them, otherwise the arms could droop or break. This is particularly important when scaling a model down, make sure that after you have scaled a body down that the arms are of a sufficient thickness to support the mass at the end.