How 3D Printing Works
Overview
There are seven different types of 3D printing / additive manufacturing processes. These are:
• Powder Bed Fusion (PBF)
• Material Extrusion
• VAT Polymerisation
• Material Jetting
• Binder Jetting
• Directed Energy Deposition
• Sheet Lamination
The different nature of each of these process types have strengths and weaknesses, with the strengths allowing for success with certain applications. However, they do all have some commonalities. One of the key commonalities is that all types of 3D printer work by taking a digital 3D model of an object / design and slicing it up into thin horizontal cross sections and laying material down layer by layer on top of each other to “build” the physical part. This is different from other methods of manufacture which generally use moulds or subtract material to produce a product. There are many advantages and disadvantages to this process, and many of the advantages have been hyped across different media and within industry. At 3DPRINTUK we are big fans of 3D printing but we strive to be objective about when and how it can be used.
We specialise in Powder Bed Fusion (PBF) technologies, specifically with polymer materials
PBF is an industrial grade 3D printing process, which, as its name suggests utilizes powdered materials. The PBF process can run both metal and polymer powdered materials, but requires radically different system set-ups for each. At 3DPRINTUK we focus solely on polymer PBF processes — and have installed two different technologies: Selective Laser Sintering (SLS) and Multi Jet Fusion (MJF). These are top end systems which require a great deal of working knowledge and expertise to run properly.
The PBF process works using a print bed covered with polymer powder. Using a heat source (a laser with SLS and infrared light with MJF) the machines melt certain areas of the print bed surface ‘colouring in’ the areas to be printed. The powder bed, which is also the build chamber, then drops by 0.1mm and is re-coated ready for another print layer, which is built onto the previous layer.
The benefits of this process are that the heat source blend layers together meaning there are far fewer visible layer lines than found when using alternative printing methods. (This blending process is also commonly referred to as melting, sintering or fusing). The materials used with the polymer PBF process are typically really strong and durable and can be post processed and finished like almost anything.
The generic process for all 3D printers
All (well most) 3D printers follow the same process for making an object. This is made up of six main stages, these are: Design (CAD), fixing, slicing, printing, post processing and finishing.

Stage 1 – CAD
This is the creation of the digital version of the object or part you want to print. All 3D printers require this to output a physical part. The digital version can either be created using Computer Aided Design (CAD) packages or by 3D scanning if you already have a physical object that you want to replicate or modify. The digital files need to be in 3D format and not 2D elevations or photographs. Once the 3D digital design is finalised, it must be converted to STL format (a digital format readable by the 3D printer) to print from.
Stage 2 – File fixing
Once the digital 3D file has been converted into STL format it needs to be checked for errors. You’d be amazed at how many there are, even from the most experienced designers. For the file to be printable, it needs to follow a certain set of rules. In a nutshell, the printer needs to read each layer as one continual outer shell of a part or it will not be able to tell where it needs to lay the material and where not to lay material. The good news is we have a free file fixing service for all 3D print orders taken through us.
Stage 3 – Slicing
Once the STL file has been designed, checked and fixed it is imported into a slicing software package. This takes each file and cuts it up into hundreds or thousands of slices that range from 0.3mm thick on the cheaper FDM machines to 0.01mm thick on ultra-high detail SLA printers . As a rule of thumb, the thinner the layer, the longer it takes to print. These slices tell the machine where to put the material on each layer. And don’t worry – we do all this for you!
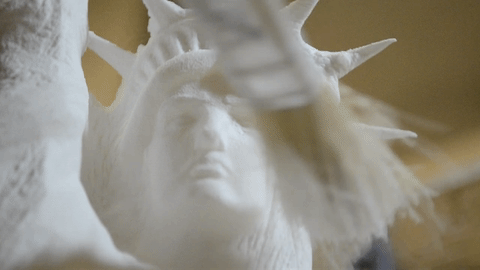
Stage 4 – Printing
This is when the product starts to get physical! The machine will take each of these slices and lay/melt/cure/sinter/fuse the material one layer at a time so that it bonds with the lower layer. This layer building process is repeated hundreds, if not thousands of times until the product is made. Some printers can print single items in minutes, and some can build in mass (like ours) where they can take up to 48 hours, but will produce much higher quantities from the same batch (our record is 2,500 in 24 hours!). Printing can be done in a range of materials, though generally in one material at a time.
Stage 5 – Post processing
Once the print is completed you may be surprised to know that there is still work to do! Depending on the machine type, you generally have to clean away any residue build materials and remove support material. With the PBF process, the powder within the bed acts as the support material. So in terms of post processing this needs to be brushed off and blasted with compressed air. With metal PBF parts have to be removed from the build plate with Wire EDM or similar. Metal PBF parts also typically require some sort of heat treatment to relieve internal stresses. Other polymer processes require the removal of uncured resin (SLA) and support structures (SLA and FDM). With the binder jetting process parts typically have to be “baked” post-build.
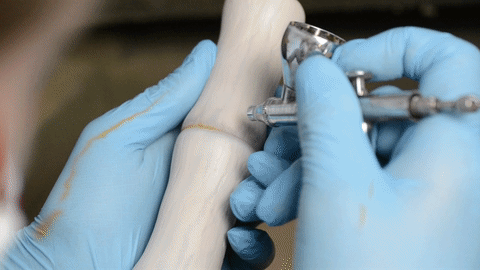
Stage 6 – Finishing (optional)
Post processing and finishing are terms often used interchangeably. Following the build and essential post processing steps required to complete the part there are further optional steps that can be taken to “finish” a part. This is because 3D printed parts often do not look like traditionally manufactured parts when they come off the machine – many of them have layer lines in them, are a single colour and may have a matt/rough texture as well as other imperfections. These don’t really matter for prototypes, but if you want the item for a display or end use it is advisable to add a finish to it – this can be as simple as a polish to give a smooth surface, or full on painting, chrome plating or detailing.
We offer a range of finishing services to improve surface finish as well as a colour dyeing service in a range of colours. Check out our FREE polishing service or our latest shot-peening service which adds a premium finish to your parts for an additional cost. You can also find out more about our colour dyeing service here.