Here’s how you cram as much as possible into the tiniest space, this means you can save money and the tycoons at 3D-print who sit in their diamond-encrusted offices, lighting 12” Havana cigars with $100 bills give you better value. Just kidding, I know that Nick sometimes uses $50s when times are tough.
When designing your parts they will be in an assembly so you can make sure everything fits together, something like this:
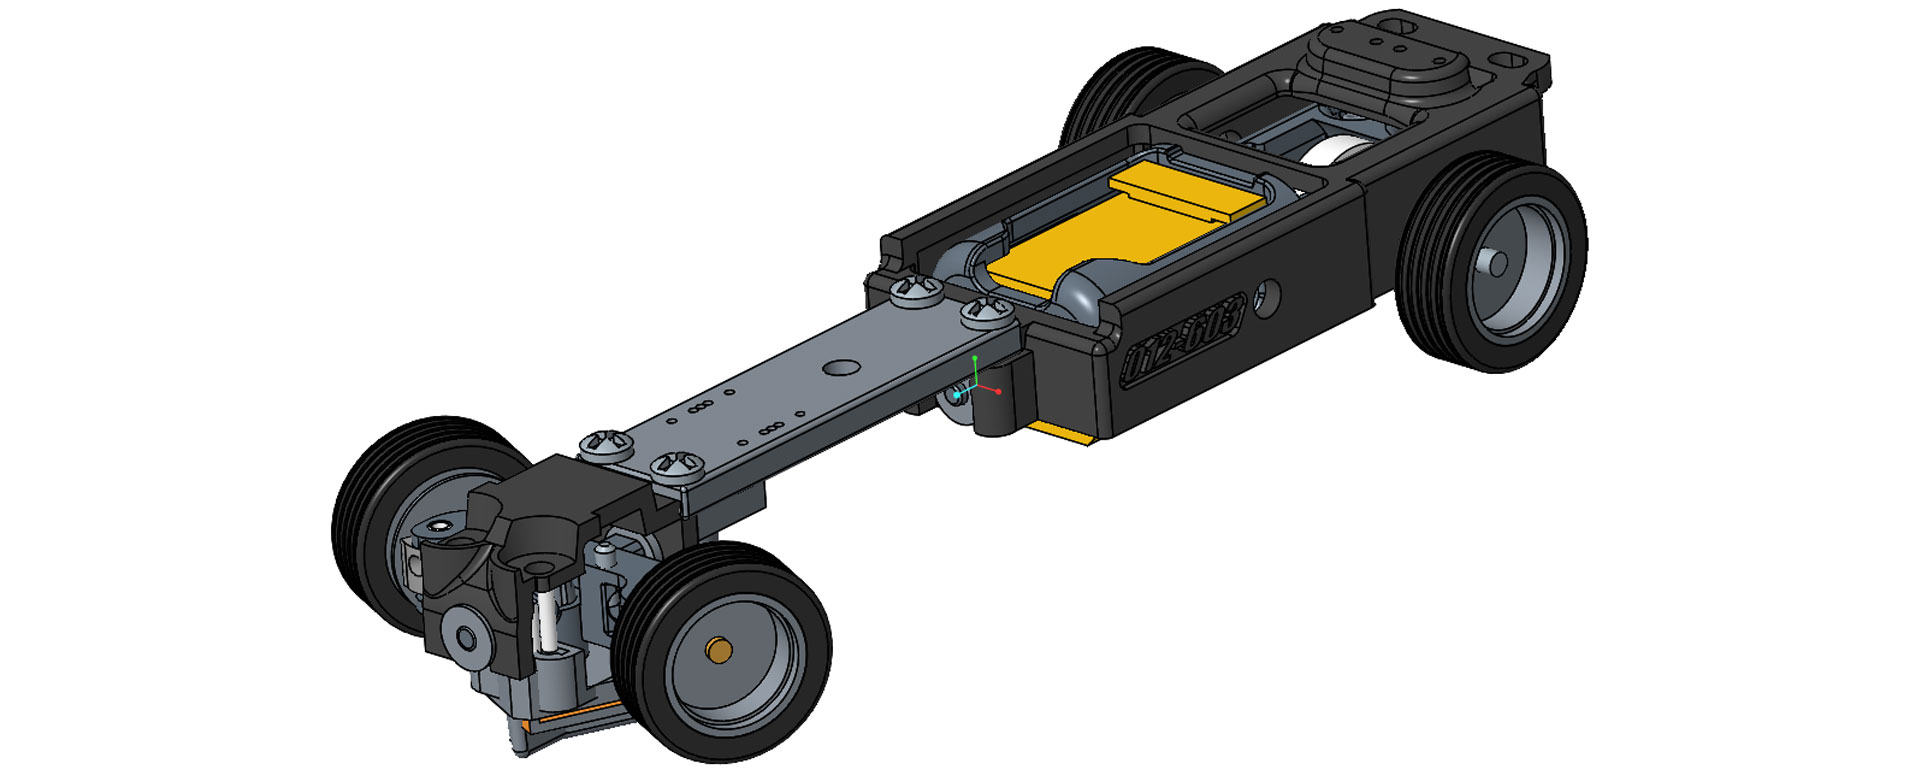
CAD is great for this, you can check for clearance between parts, screw holes line up etc. At this stage, try and put in as much detail as possible so nothing gets overlooked. Screw heads are always bigger than you hoped so design in clearance for them now. If you’ve got any wiring in there try and put that in too, even if it’s very simple. Call this your working assembly.
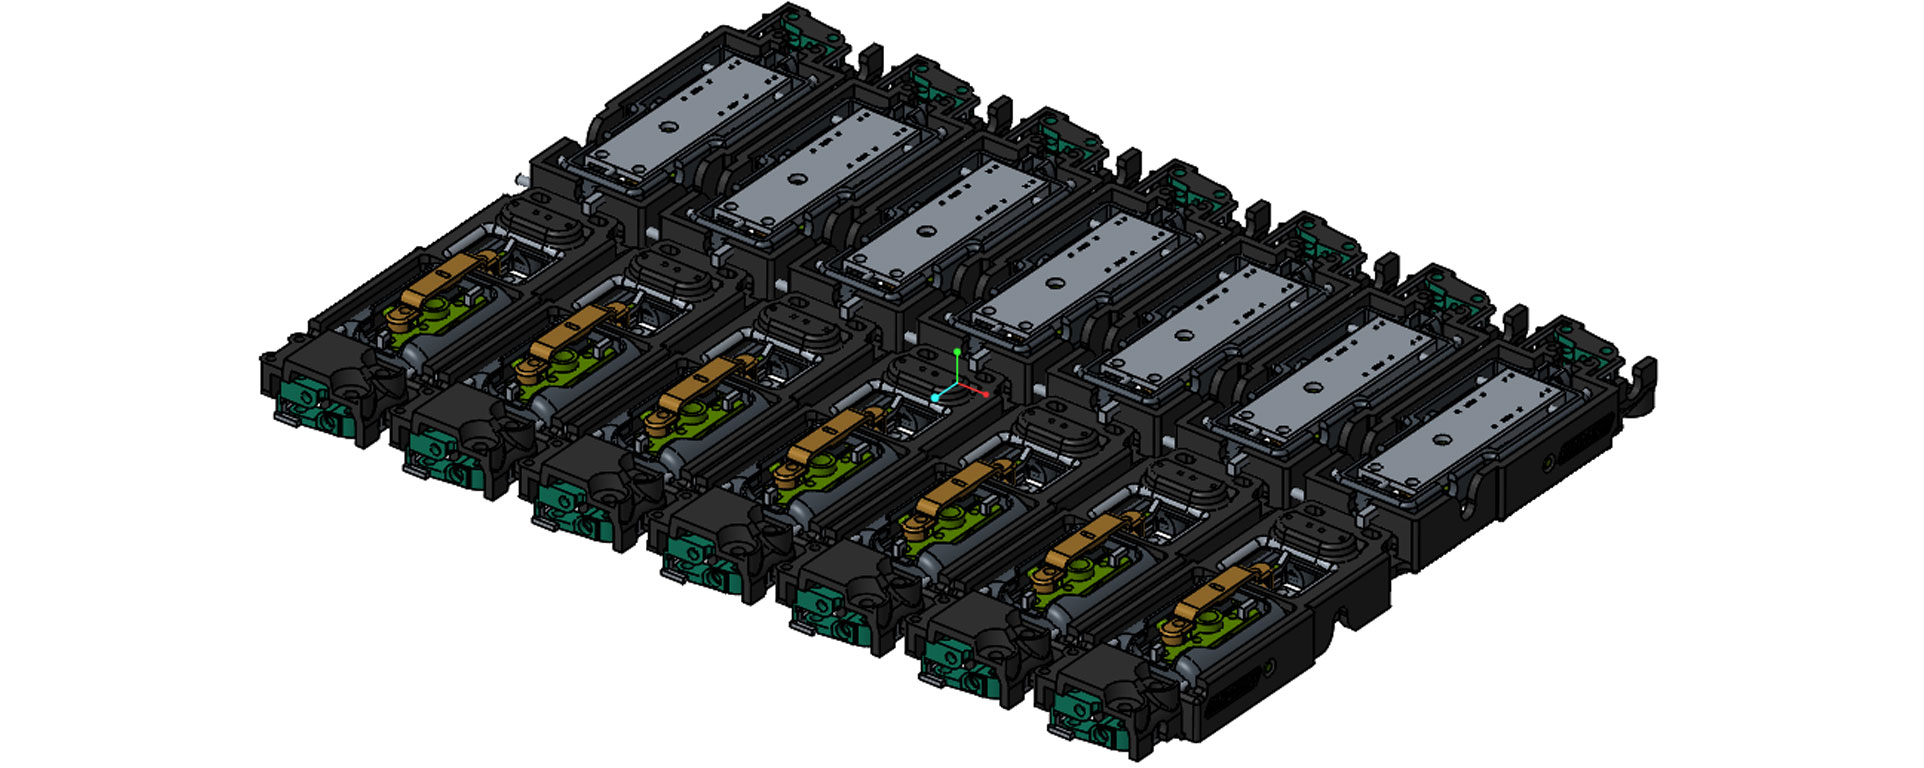
From there, create a new assembly which will be how the parts are to be printed. Call this your SLS assembly. Your aims here are:
- To fit all the parts as closely as possible, leaving a 1.5mm gap between them.
- To make it easy to separate all the parts so you can use them in your project. Like an Airfix kit has everything on a sprue frame, I do the same with features in my SLS assembly. The size of these sprues depends on the weight of the parts and where you can get the support in. About 1.5mm diameter (or square) is as small as I dare to go and I use a few all around the component to spread the load. This means they’re easy to cut off but strong enough to hold everything when they’re removed from the SLS machine.
- If there’s any post-processing required like clearing powder from holes, try and make sure they are orientated so this is easy and the features aren’t buried inside your SLS assembly.
- Put your name or a made-up part number on there somewhere. You might think your design of cufflinks like Snoopy on a wind turbine is unique, but maybe it isn’t. This helps the guys who unpack the parts from the machines identify the parts more easily. If you sell them on to someone else they can also identify what they’ve got if they contact you again. “Ah yes, that’s the Mk2 Snoopy on a wind turbine. Of course I can let you have another 200 pairs.”
- When nesting the parts together, experiment with putting more than one set together. Sometimes you can get 4 assemblies in a space not much bigger than 1.
You thought that was it? No, because if you really want to minimise your cost you go back to the SLS assembly and see where parts don’t quite fit, then change them so you can squeeze them in tighter. You have to re-check them in the first assembly to ensure it doesn’t mess things up, but it’s well worth doing. Let’s do an example.
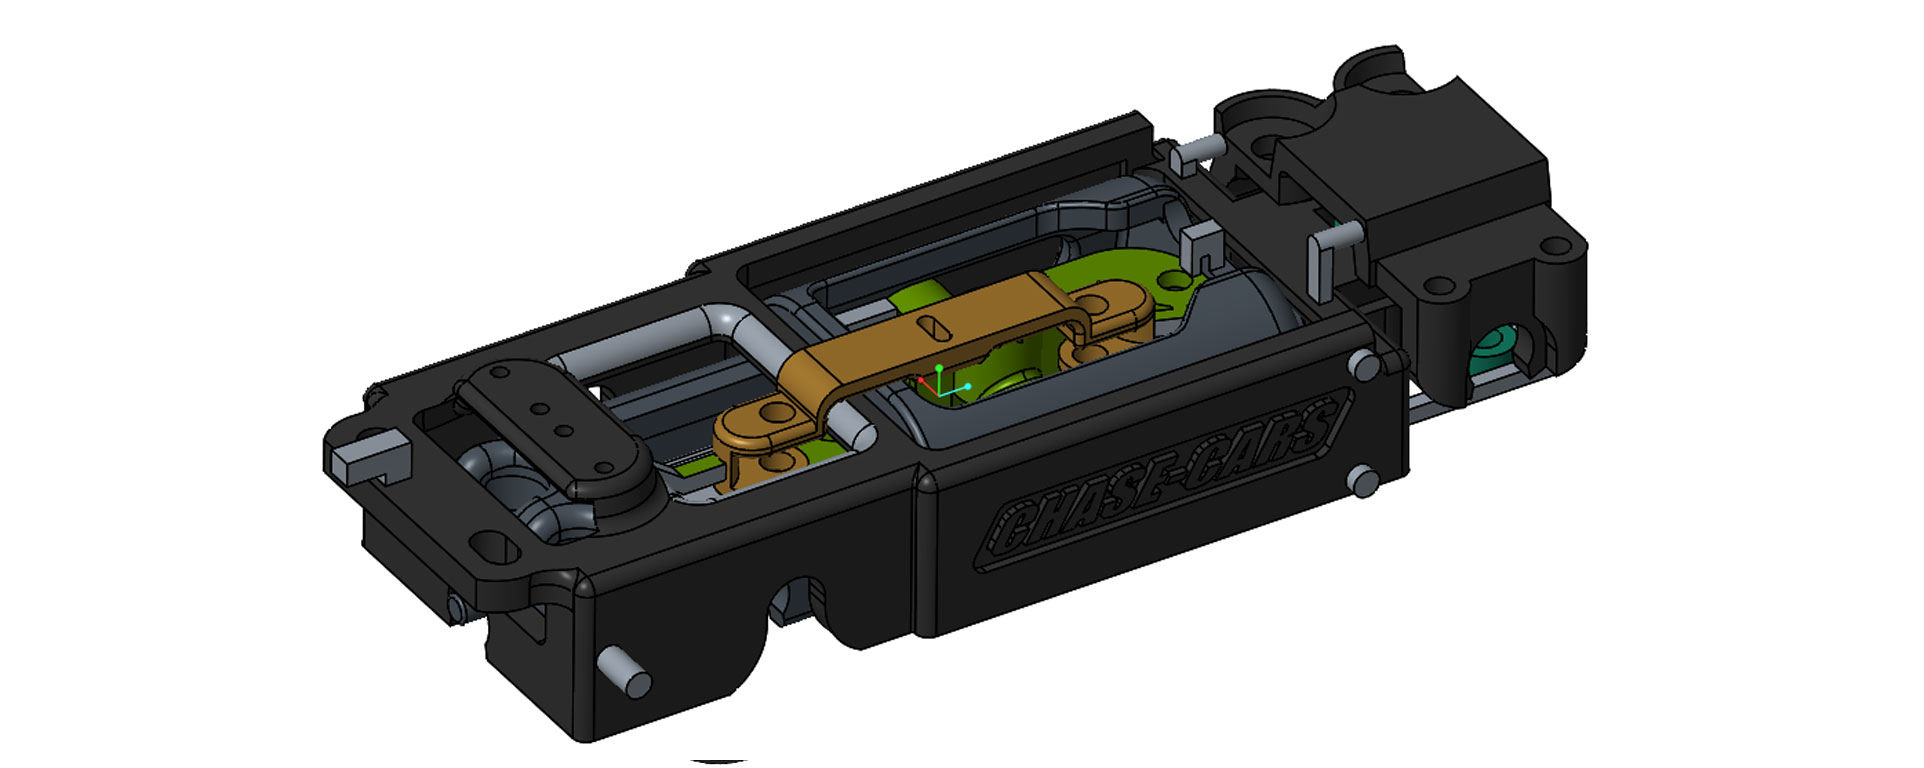
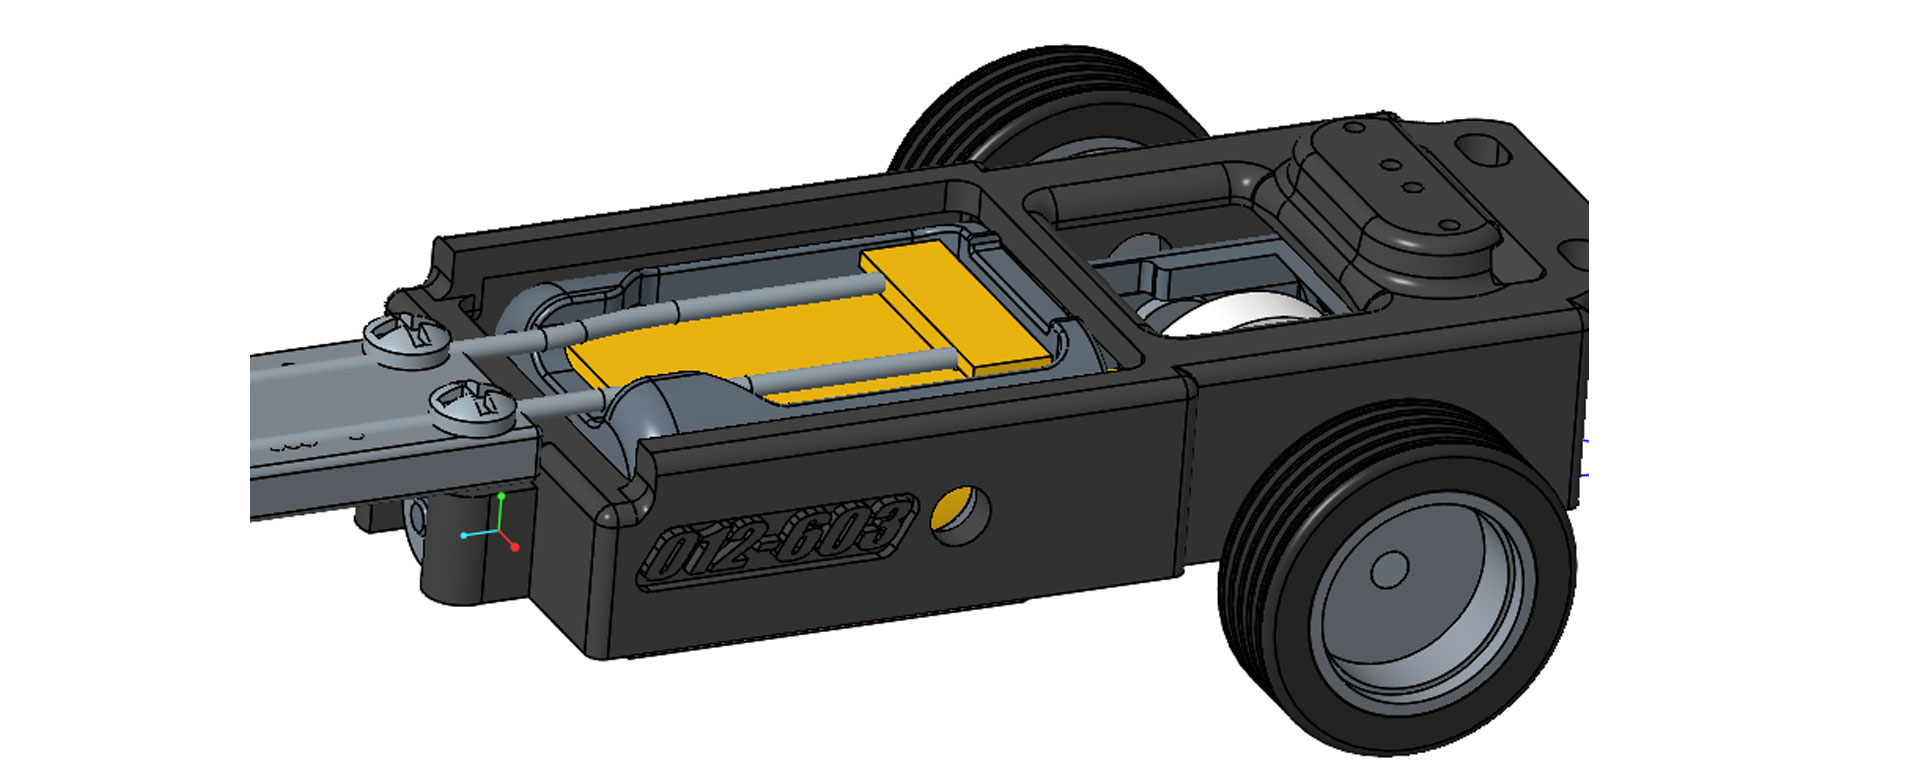
The green part nestled in the middle was a bit too wide; it’s actually sticking through the outer grey parts. Let’s cut a hole in the grey parts for clearance and see how it looks.
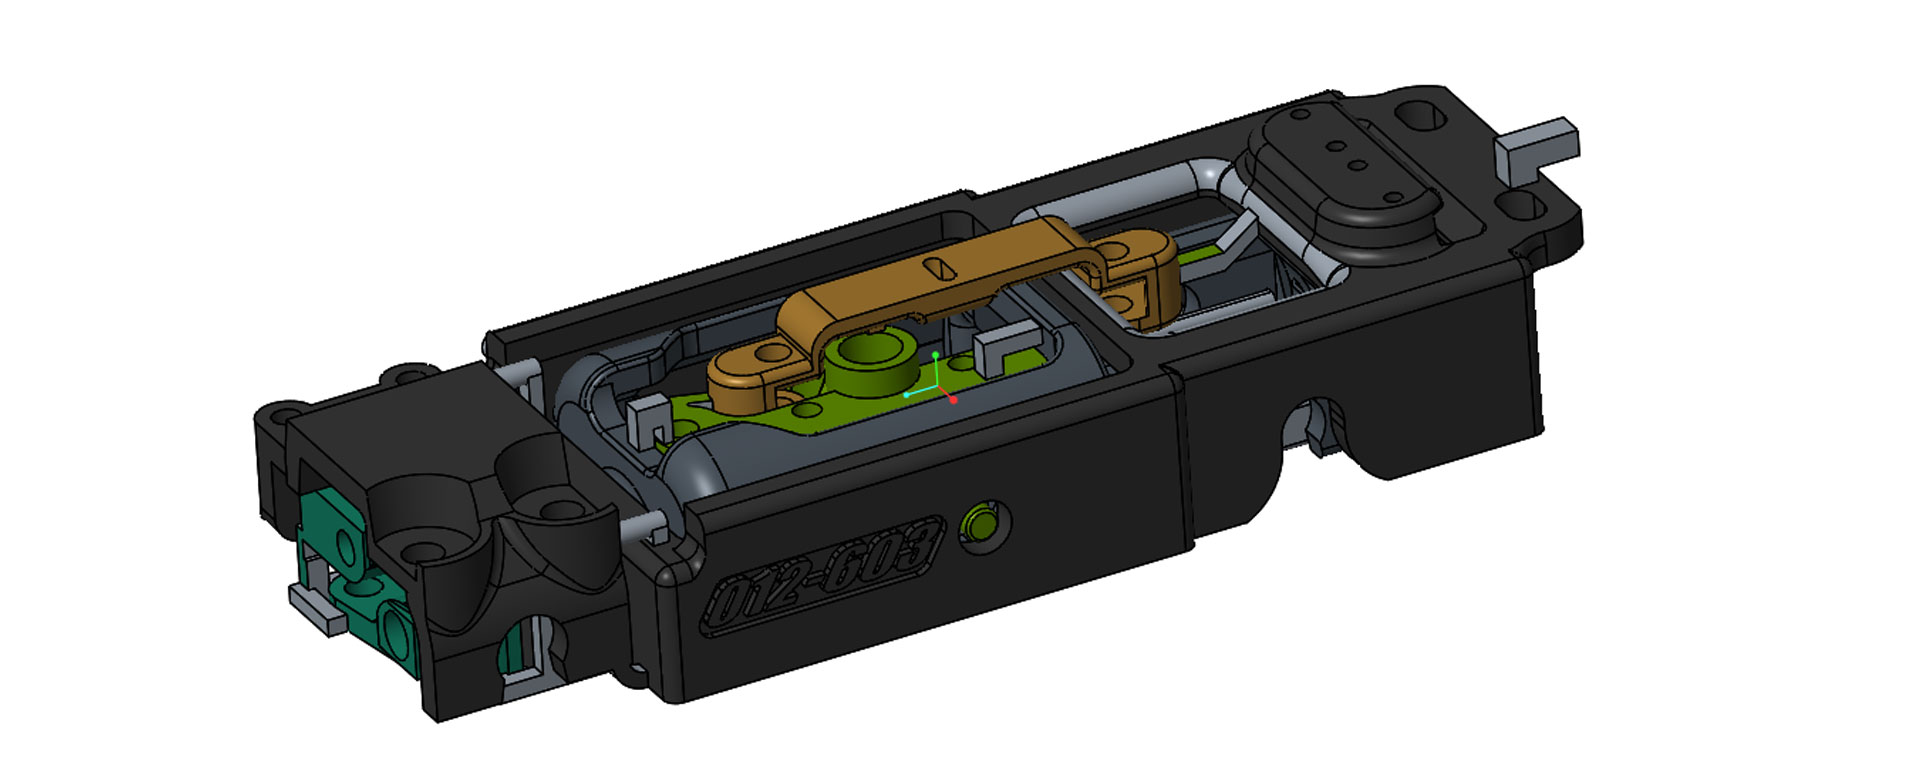
Looks a bit strange with the hole, but this is a hidden part so I’ve got some freedom. How does it work in the finished assembly?
That seems ok, and it means I can squeeze the parts in tighter. Now you make sure it all fits in the SLS assembly, and you’re good to go.
Create another assembly called grouped SLS and make sure you’ve got all the sprues in place that hold them together. This is what you send off to the guys at 3Dprint and this is where you see the real saving.