MAKING STRUCTURES SOLID
Hello and welcome to this short tutorial on Making Structures Solid.
My name is Paul and I’d like to share some of the things I’ve found out about making solid structures using Sketchup. The information in this tutorial relates specifically to the free version of Sketchup. The paid-for version (Sketchup Pro) is essentially the same but has some additional tools for dealing with solid structures.
What is a “solid” structure?
If you only use Sketchup to produce images on a computer, then it does not really matter whether the structures you generate are solid or not. If, however, you want to print your images using a 3d printer then it becomes necessary to ensure that the structures you create are “solid”.
To be solid a structure:
1. Must be formed from one continuous surface with no breaks or holes. You could think of your structure in terms of a bucket. Like the bucket your structure must not “leak” – that is if you imagined pouring water into it, the water would be contained within it.
2. Must not contain any extra lines or surfaces – since lines are only of 1 dimension and surfaces are only 2 dimensions, you cannot 3 dimensionally print them.
How do I know if my structure is solid?
For a structure to be “solid” it must first be grouped. Although it is possible to create a structure that obeys the two rules above and that consists only of a number of surfaces, it will remain merely a collection of entities until Sketchup recognises it as a single object. This happens when the entities are grouped. (As far as this tutorial is concerned, components are the same as groups.)
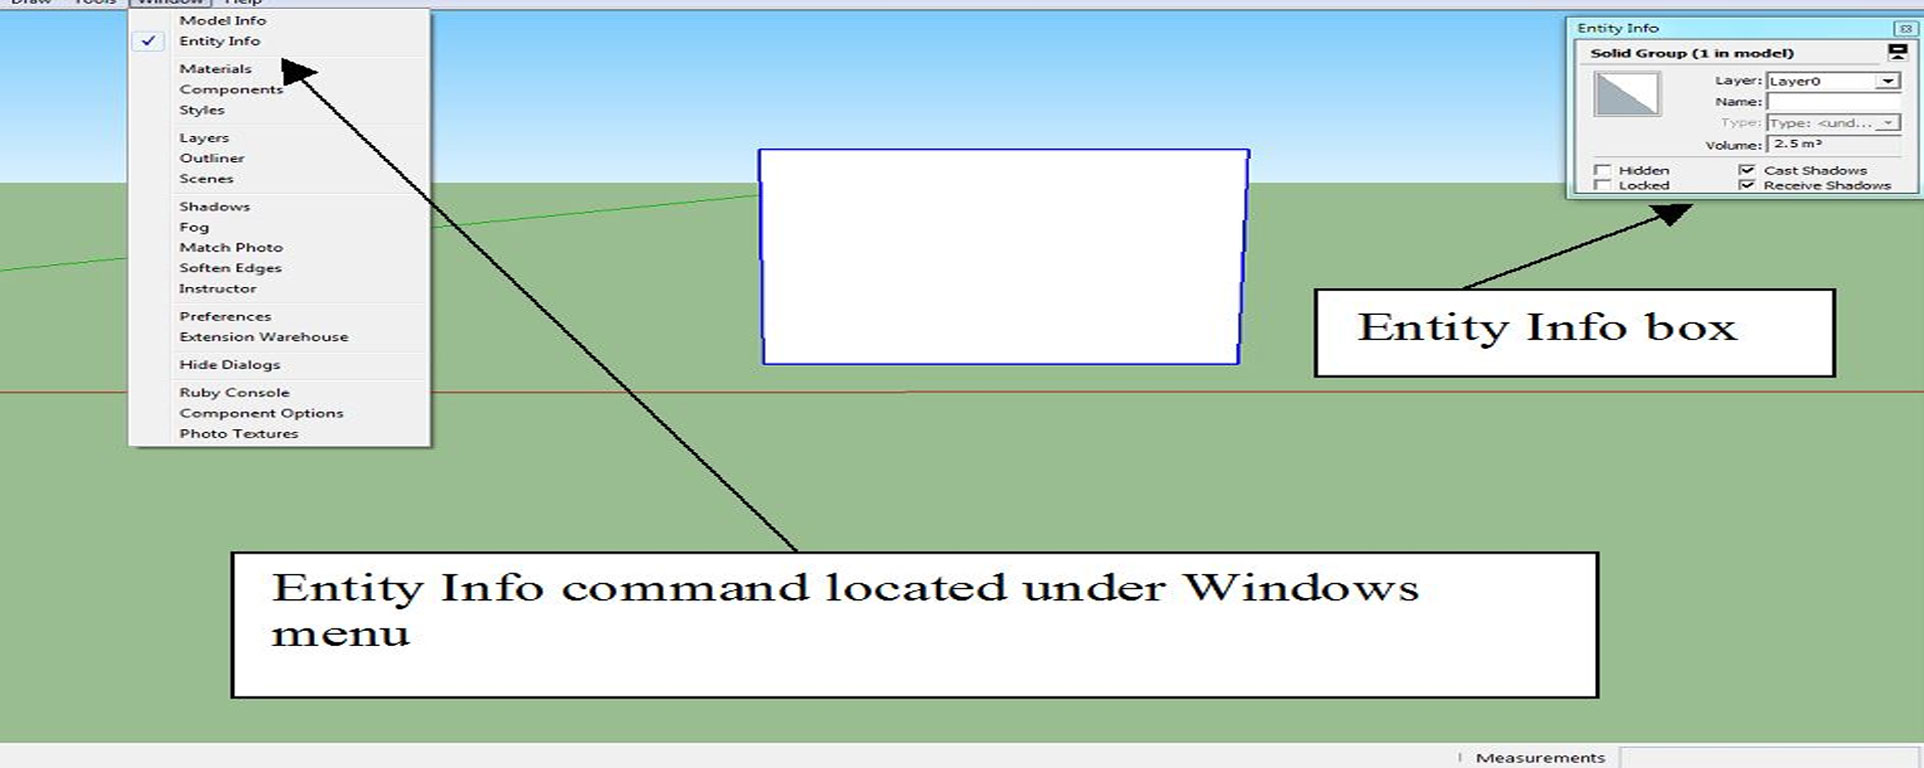
Sketchup provides a tool for showing if a group is solid or not. In the Window menu, ticking the Entity Info command and then selecting a group will bring up the Entity Info box and details of that group.
In the example below, the group outlined in blue is solid as indicated in the Entity Info box – “Solid Group (1 in model)”. It also has a volume – in this case 2.5m3 .
Non-solid structures cannot have a volume. As their extent is not limited, their volume would be infinite.
Fixing non-solid structures
Although Sketchup will tell us if a structure is solid or not, it does not tell us why it’s not solid. In the course of designing a structure a group may go from solid to non-solid and back again several times as its make-up changes.
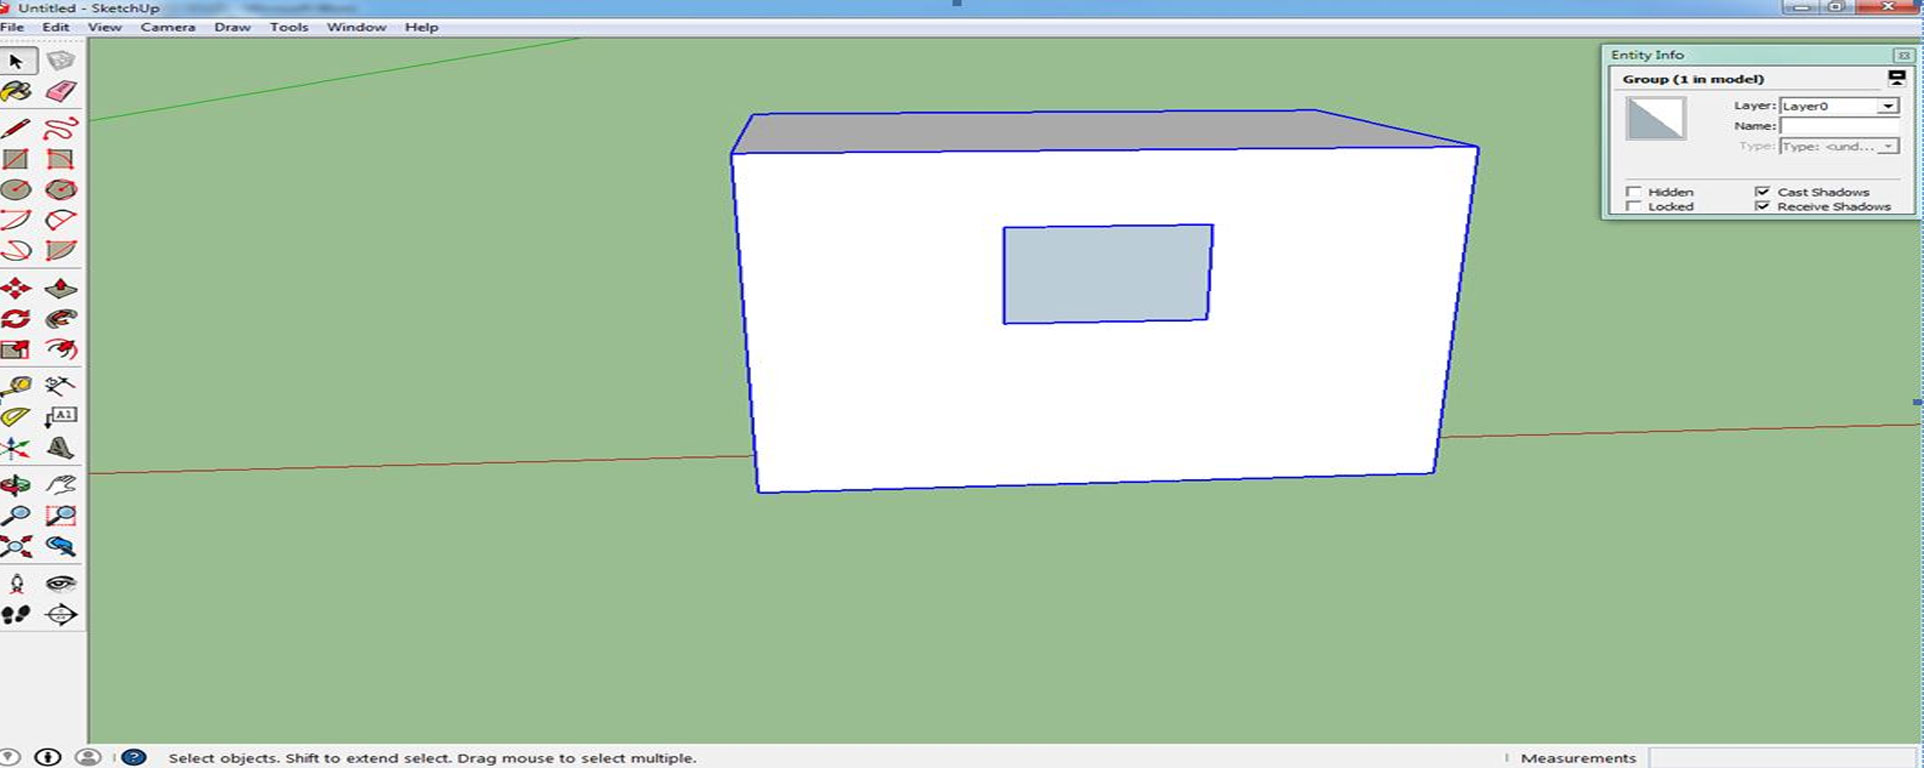
In the example above the similar structure is now not solid. The Entity Info box simply declares it a “Group” not a “Solid Group” as it was before. Furthermore there is no volume shown.
In order to investigate further a plug-in tool called “Solid Inspector” provided via the Extension Warehouse will inspect the group and highlight problem areas.
(At the time of writing – December 2014 – a new version of Solid Inspector has just been released. This has more features than the version discussed here.)
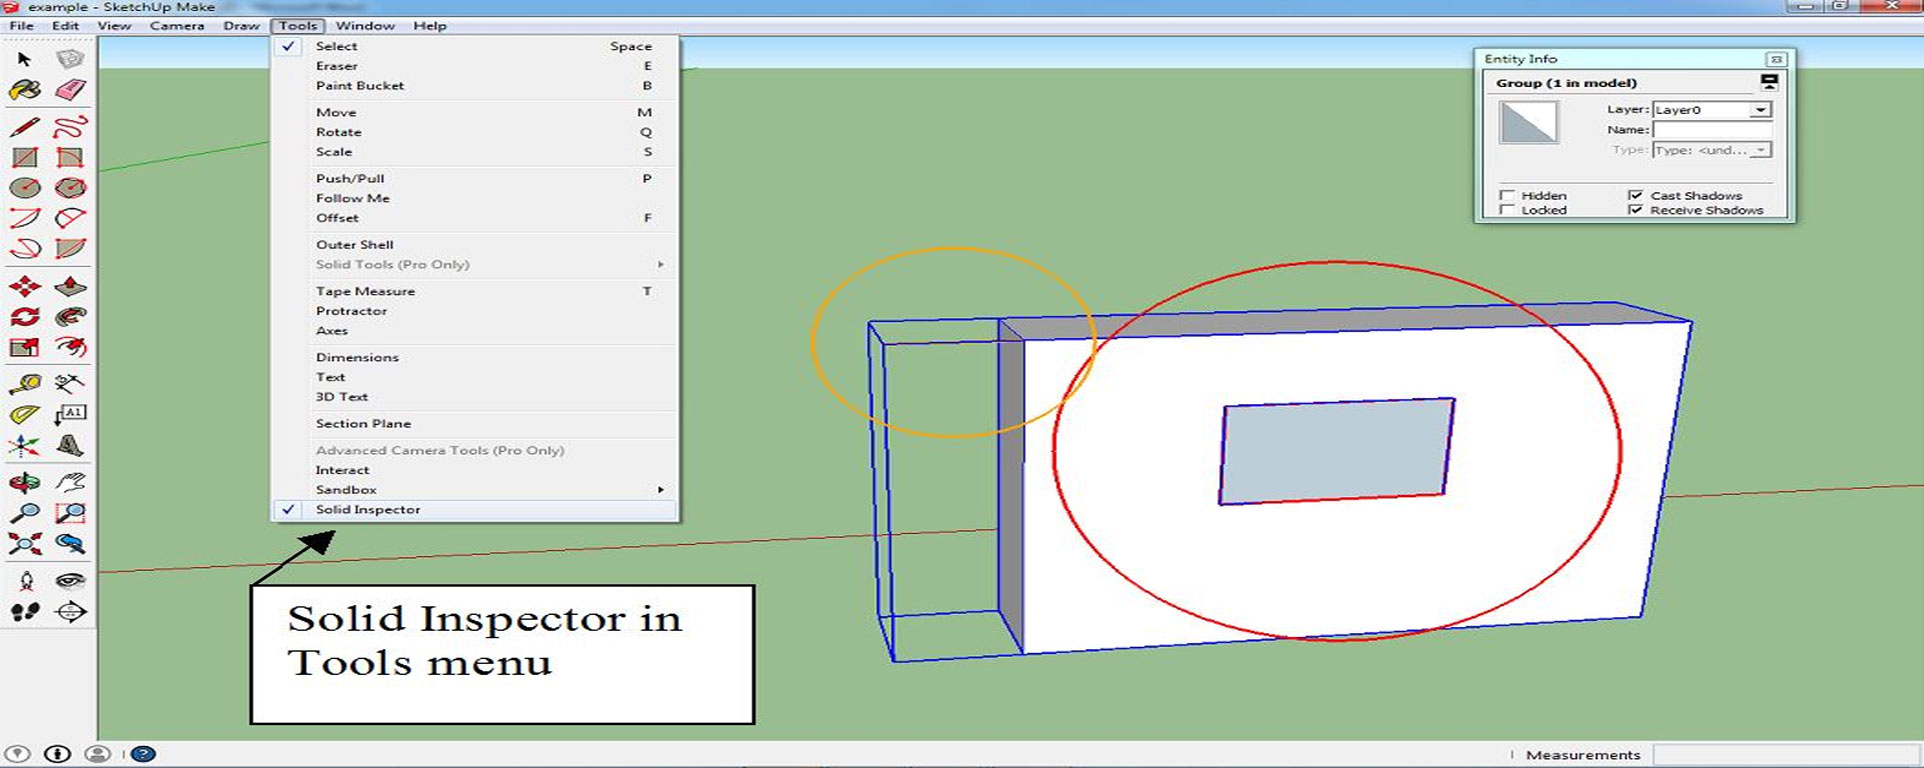
Once installed Solid Inspector is accessed from the Tools Menu. Select the group then select Solid Inspector.
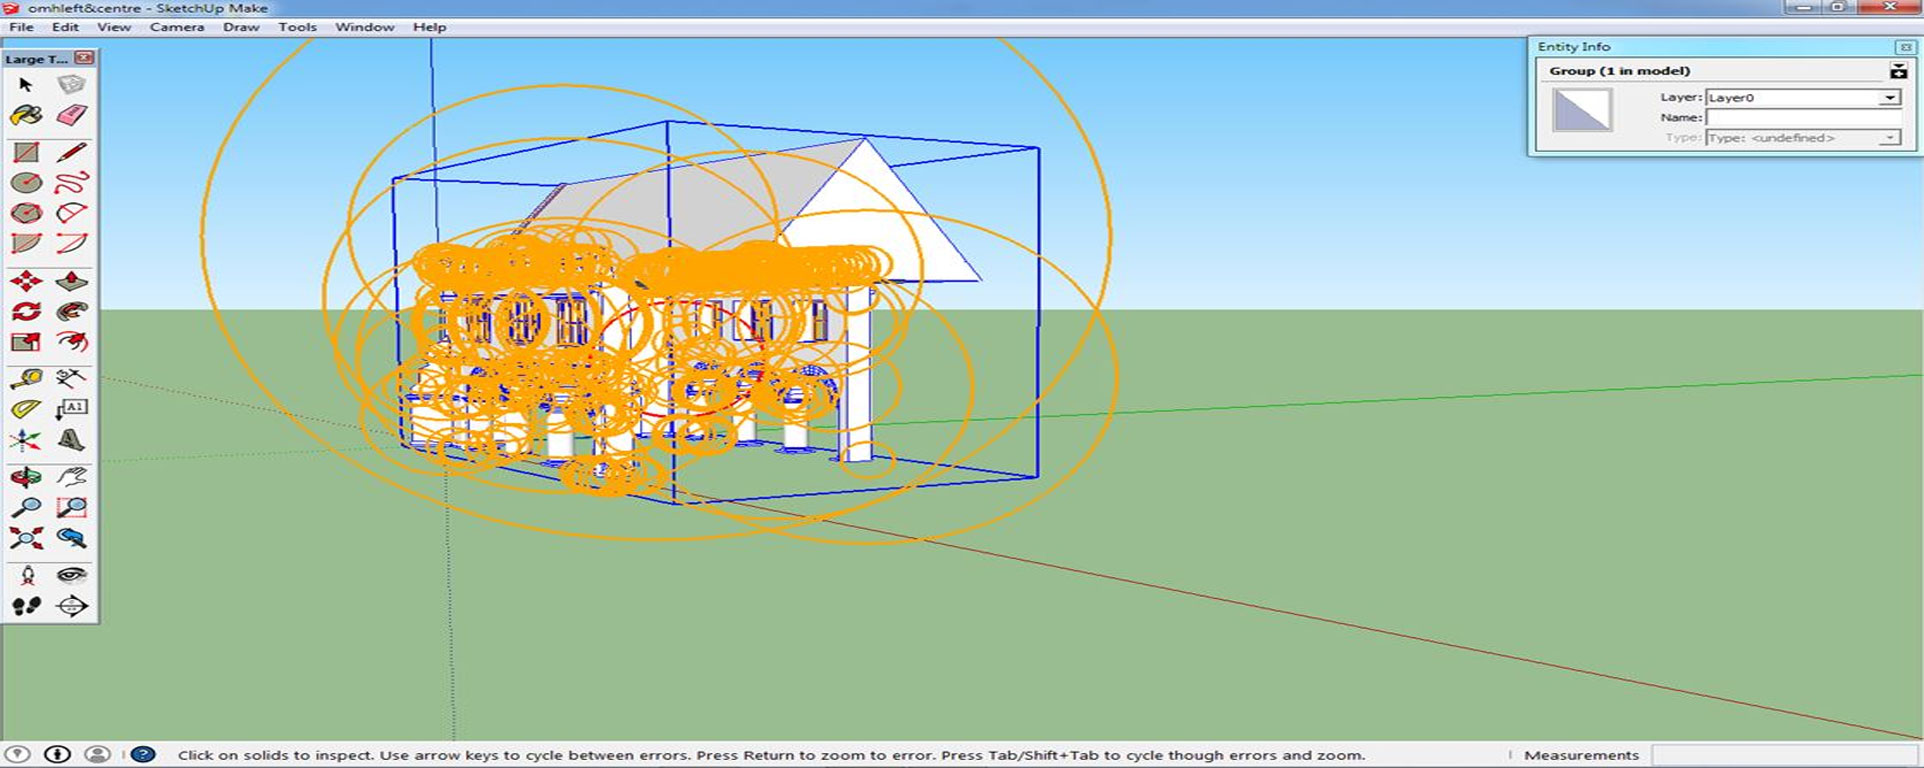
One or a number of circles will appear on the group identifying the problem areas. In the example these relate to a hole that has appeared within the previously solid structure (outlined in red). There is also another problem outlined in yellow relating to an isolated line. Clearly, water poured into this structure would now leak out through the hole. The extra line adds a further problem.
(The grey area visible through the hole is the back face of the rear surface of the structure. See discussion of faces later.)
This version of Solid Inspector is not able to fix the problem although the newer version, apparently, can. You will have to fix it yourself. In our example this simply means deleting the hole and the line to return the structure back to being solid. (If only all solid problems were that easily fixed!)
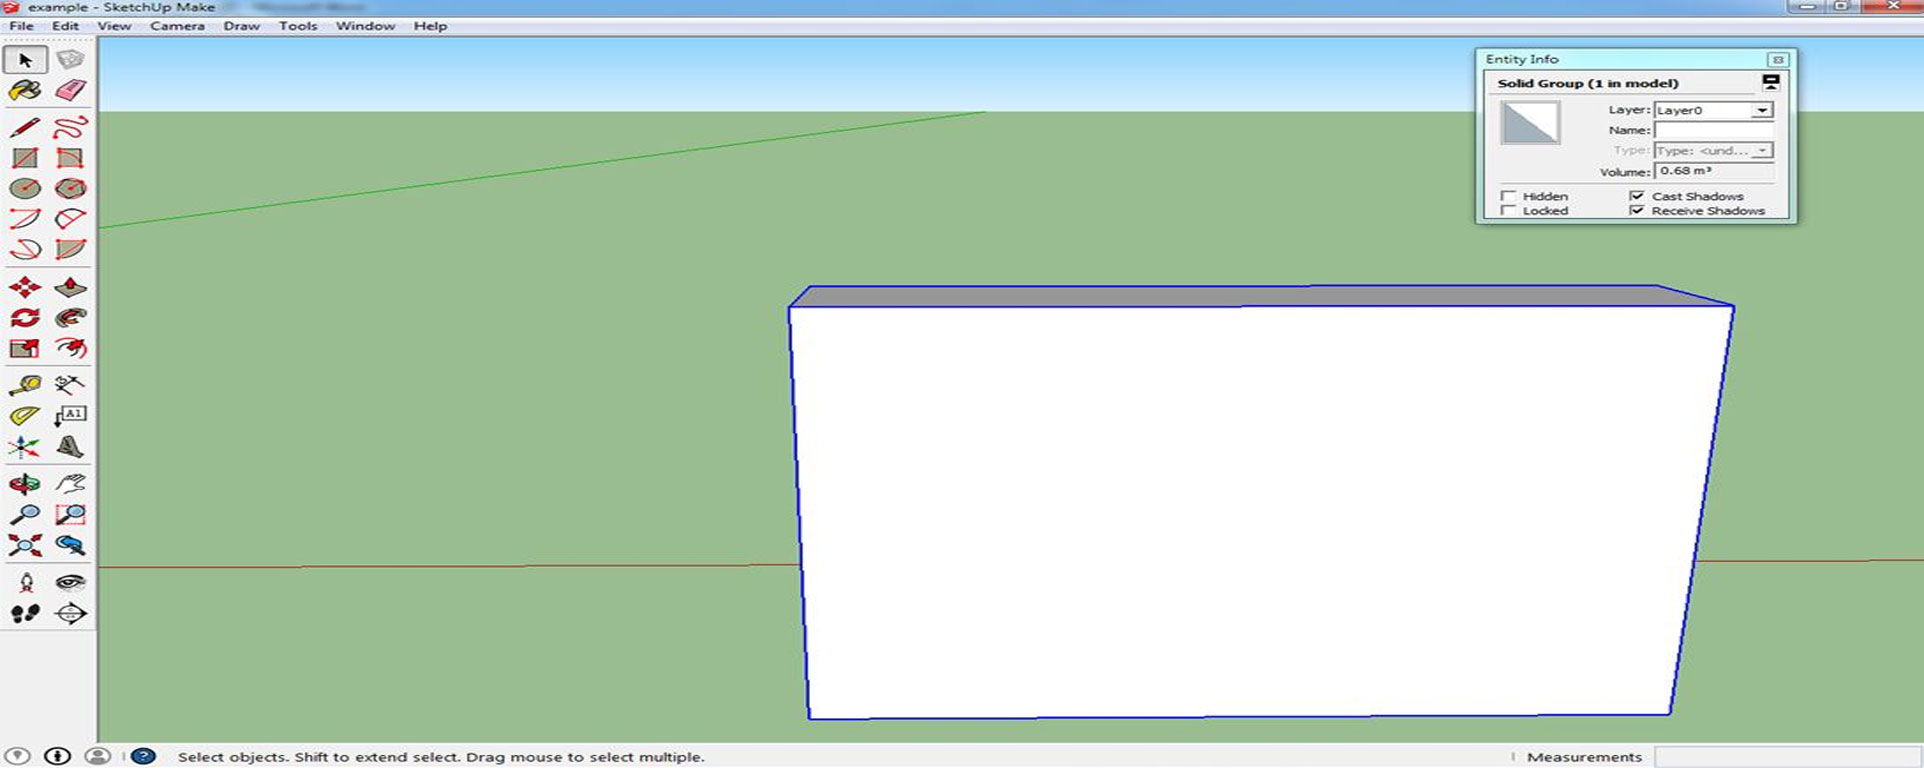
Now the Entity Info box shows “Solid Group (1 in model)” as before.
Obviously these are very simple examples. In practice, structures are usually much more complex and can generate multiple problems of solidity. Here’s a model almost totally obscured by problems found by Solid Inspector. Of course, it’s much easier to avoid getting into this kind of tangle in the first place!
A word on nesting groups
Don’t.
Although Sketchup allows for many levels of nested groups (that is a group containing another group) it is not possible to select two groups at the same time if one is nested inside another. It will become apparent why this is important, shortly.
Preparing for 3D Printing.
Of course structures are rarely as simple as the examples above.
In the following example there is now a second solid group introduced into the previous solid group. It looks like a window.
(Working with groups is much easier than simply drawing in the window each time you want one. Groups can be copied, scaled and so on without having to re-draw one each time. This is particularly useful in the case of windows where you may require several in your model.)
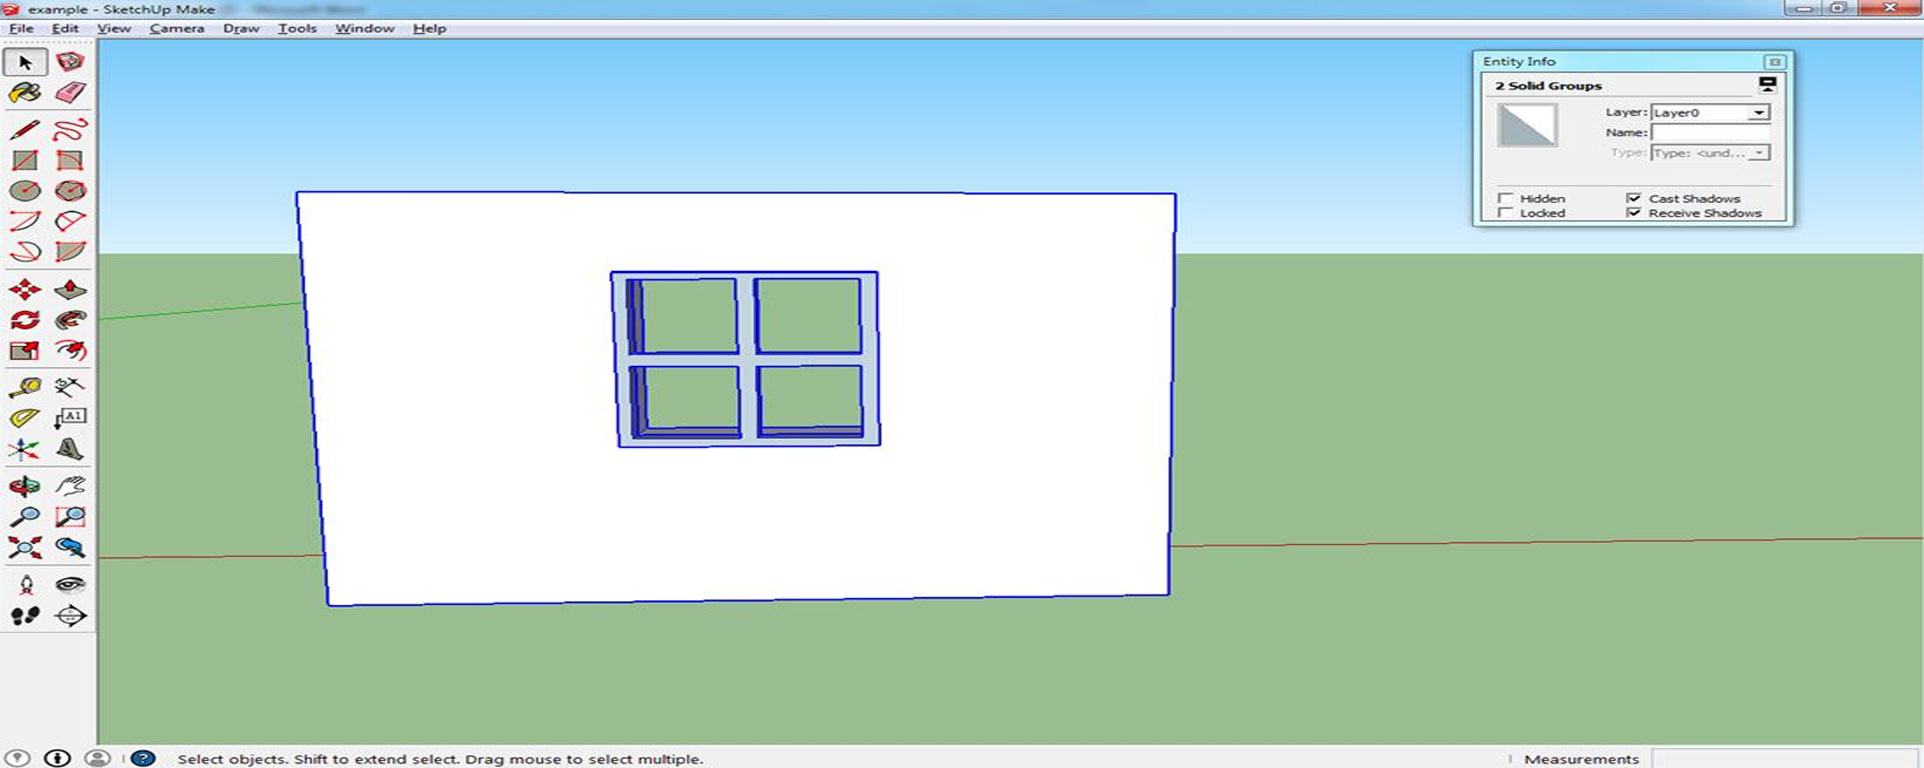
If we wanted to 3D print the example above we could generate an STL file from the model as it stands. It may print without problems but this cannot be guaranteed. The potential problem lies with the existence of adjacent but separate surfaces. Both of the groups are solid. There are four surfaces closing the hole in the big group and four surfaces closing the structure of the window. When the window is in place, these surfaces are in contact. You can see this better if the groups are moved apart as in the example below.
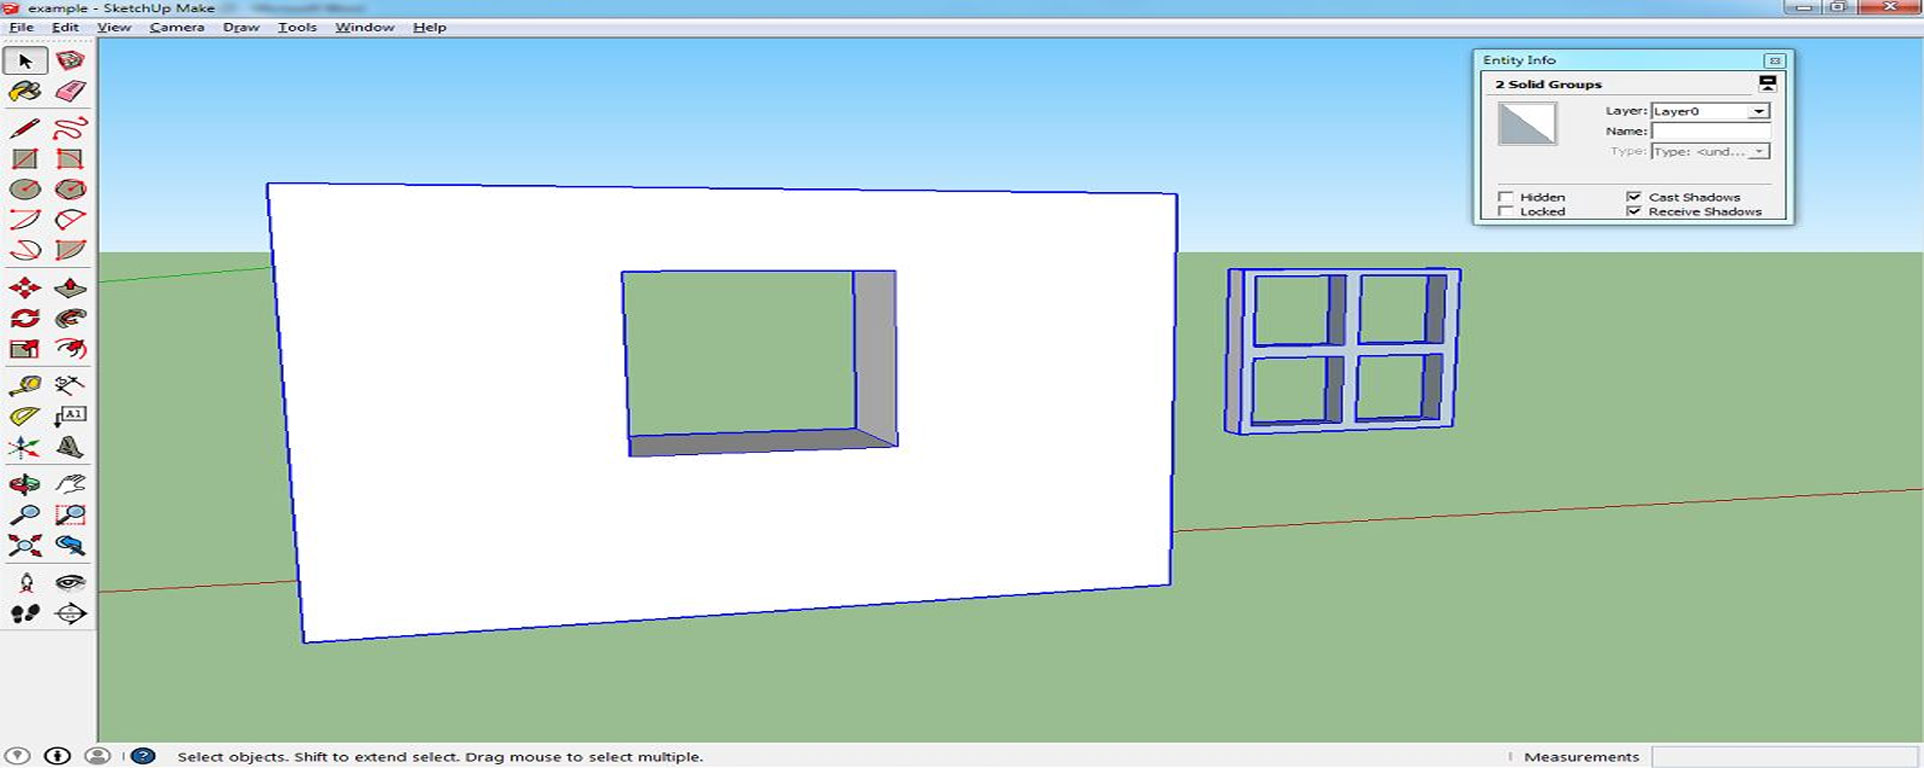
Sometimes this could cause a problem. Different software may react differently to this situation.
Although our friends at may spot and fix it, it is better not to take the chance.
Luckily, Sketchup provides a simple way of alleviating this problem. We can merge the two solid groups together forming one new solid group.
On the Tools menu is a tool called Outer Shell. Select one of the groups to be joined. Select the Outer Shell tool. This brings up a cursor with a little number 1 in it.
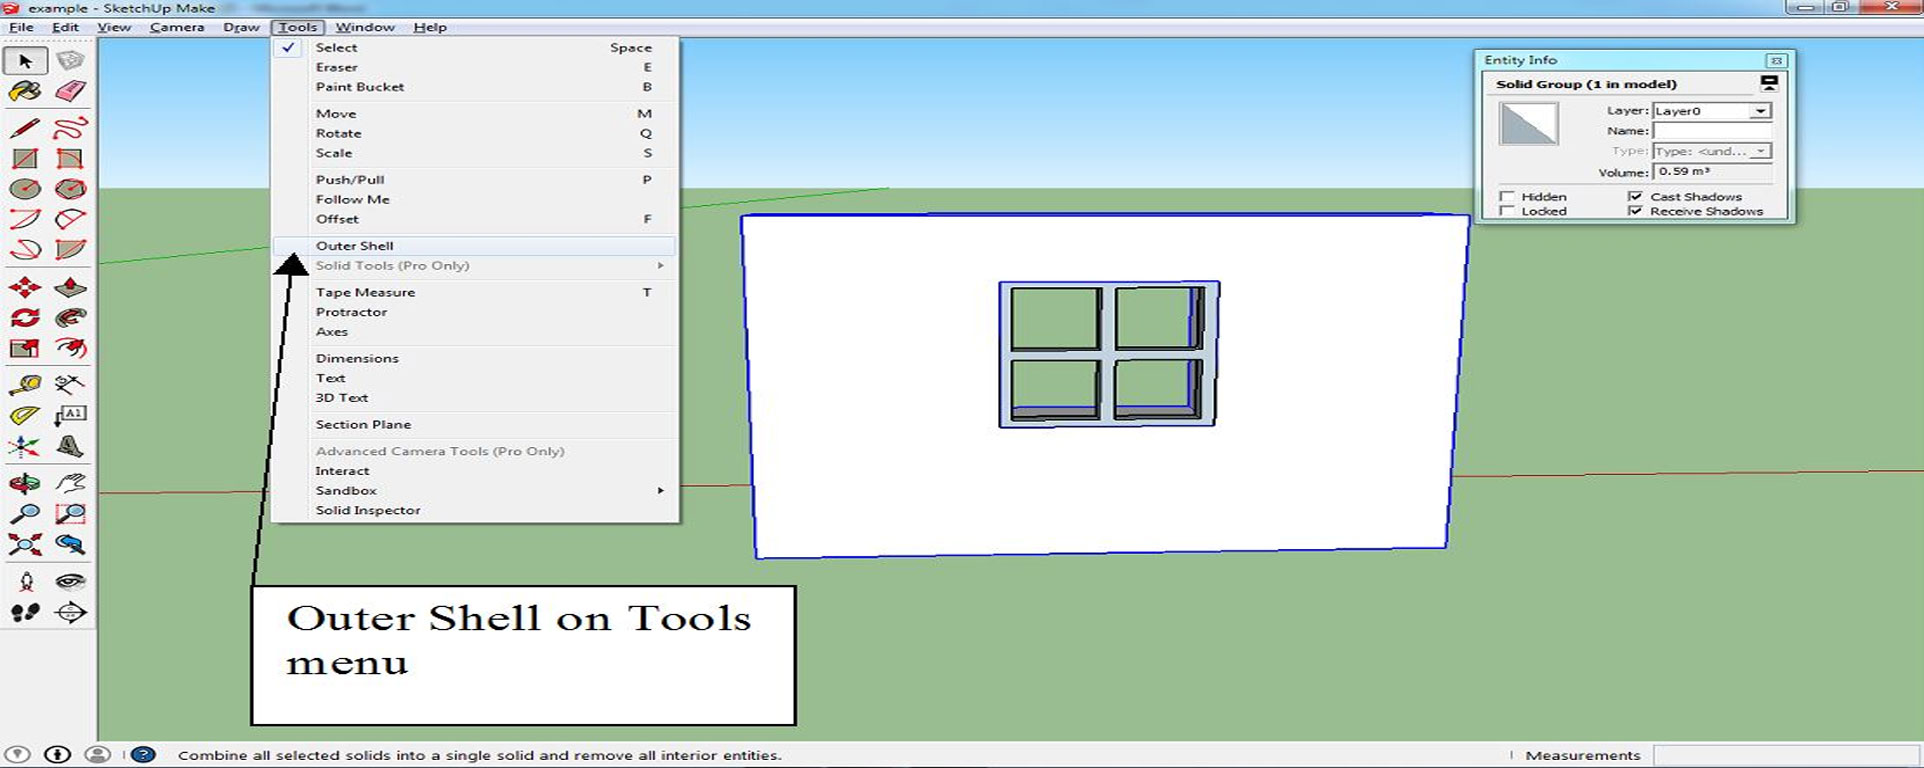
Hover the cursor over the other group to be merged. The cursor shows 2 and the Entity Info box shows ” 2 Solid Groups”. Click on the second group. Sketchup will whirr and clank a bit depending on how complicated the groups are.
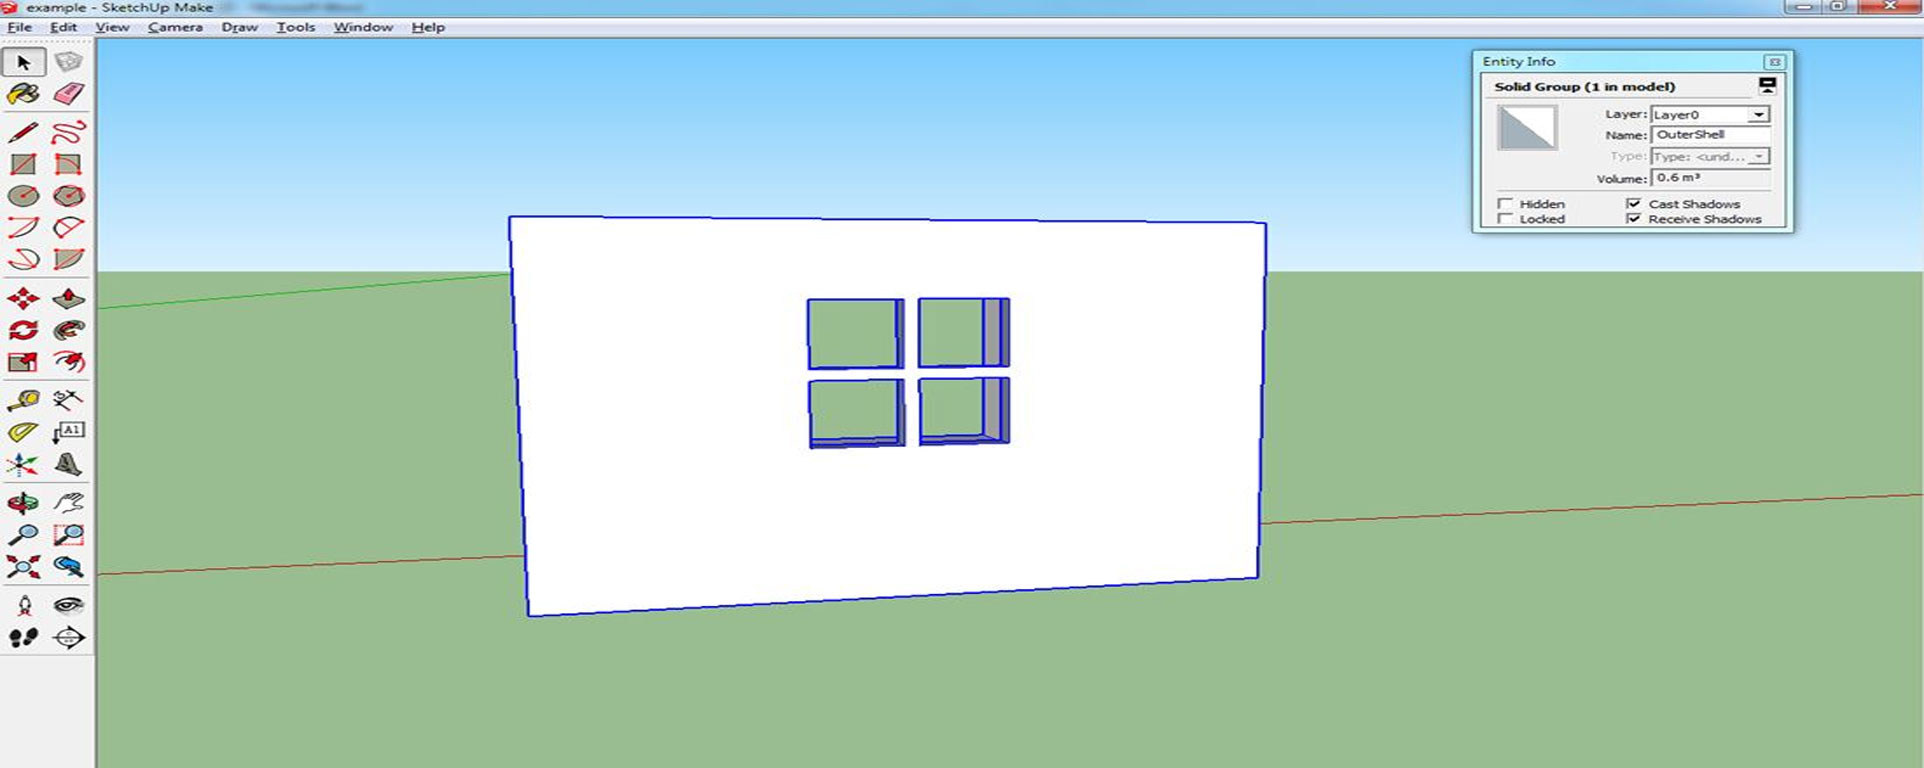
Eventually, the Entity Info box will change to Solid Group and both of the groups will have been merged with all unnecessary lines and surfaces removed. You can do this as many times as is necessary. Unfortunately you can only do two groups at a time.
The end result is a single, solid structure fit for 3D printing.
A word about faces
Each surface has two faces. By default Sketchup colours the front face white and the back face grey. The front face should be the one facing outwards from the structure. (We are talking here about the sides of a single surface, not the back and front of the structure.) The back face therefore is inside the structure and not normally seen.
Sometimes during the course of building a structure a face can be reversed as in the example below where the grey colour indicates that this is a back face. This can confuse 3d printing software which may read the reversed face as a “hole”.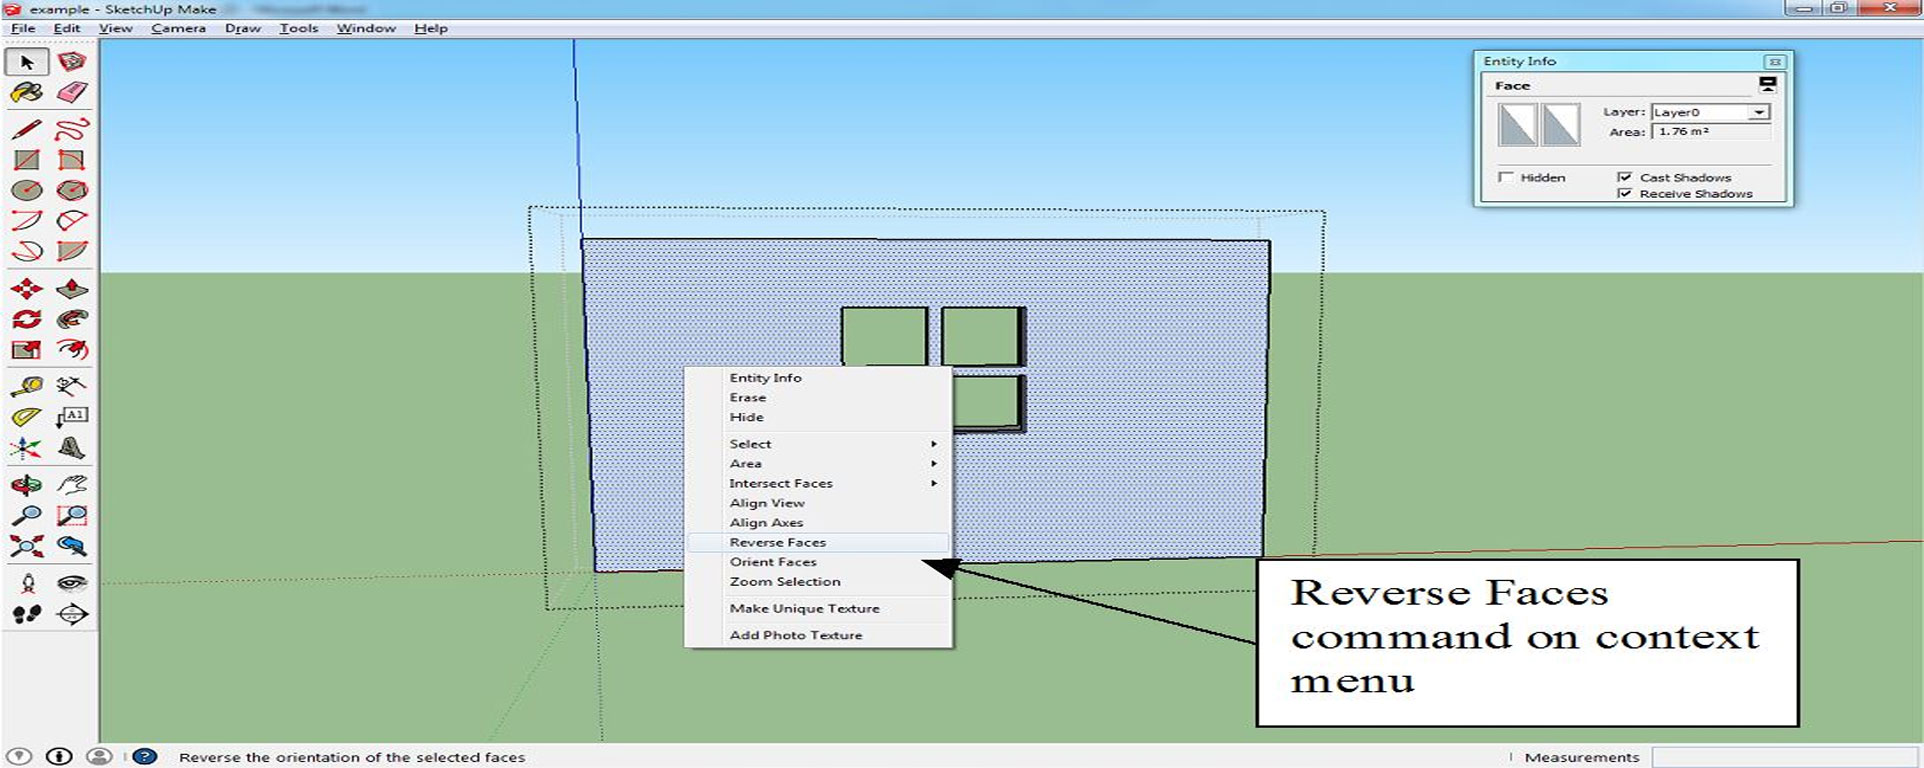
To reverse the orientation of a face, select it, then right click on it to bring up the context menu. Select “Reverse Faces” . This then reverses both faces of the surface.
If there are a lot of faces to reverse, Sketchup provides a tool “Orient Faces” also on the context menu. Select a face that is correctly oriented and then select “Orient Faces” and Sketchup will go through the model changing any faces that are not correct.
This is not really to do with solid structures since the orientation of a face won’t affect the structure, but I thought it worth mentioning as it can cause problems for 3d printers.
I hope this tutorial has helped to clear up some of the mysteries around solid structures.
Paul
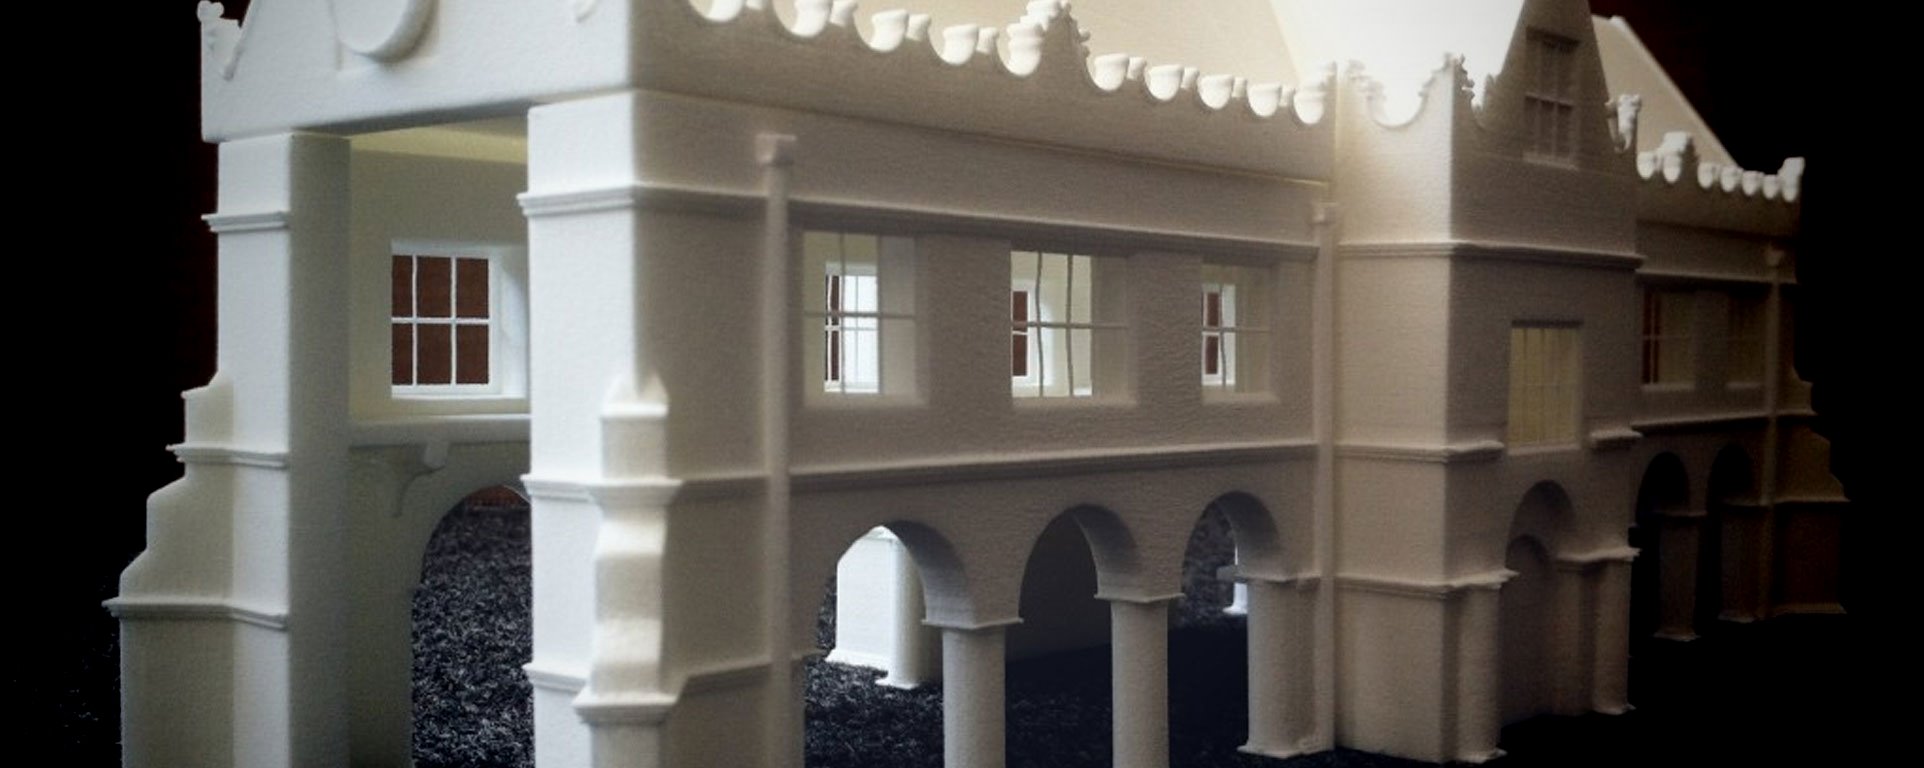
P.S. Here’s one I made earlier :)
